If you want the short version, the workflow is simple: write your line, pick a character or upload a sprite, tune the font and border, then export a still image, GIF, or MP4.
This guide covers the current version of the Undertale text box generator as it exists right now. No wishful marketing copy. Just the features that are actually in the editor today.
What the Generator Can Do Right Now
The current editor gives you one browser-based workflow for Undertale-style and Deltarune-style dialogue boxes:
- Multi-line dialogue input
- Built-in color codes like
\yellowand\red - Built-in portraits for Sans, Papyrus, Toriel, Kris, Susie, and Ralsei
- Custom sprite upload or custom image URL input
- Font controls, text size, letter spacing, and case transform
- Border style presets, including Undertale, Deltarune, Underfell, Earthbound, and other AU-inspired frames
- Live preview with a typewriter animation button
- PNG export, GIF export, and MP4 export with typing audio
If that is the exact job you came for, you are in the right place.
Step 1: Open the Editor and Start with the Text
Go to the homepage and jump to the main generator section. The text box on the left is where the whole scene starts.
This is what the current homepage editor looks like right now:
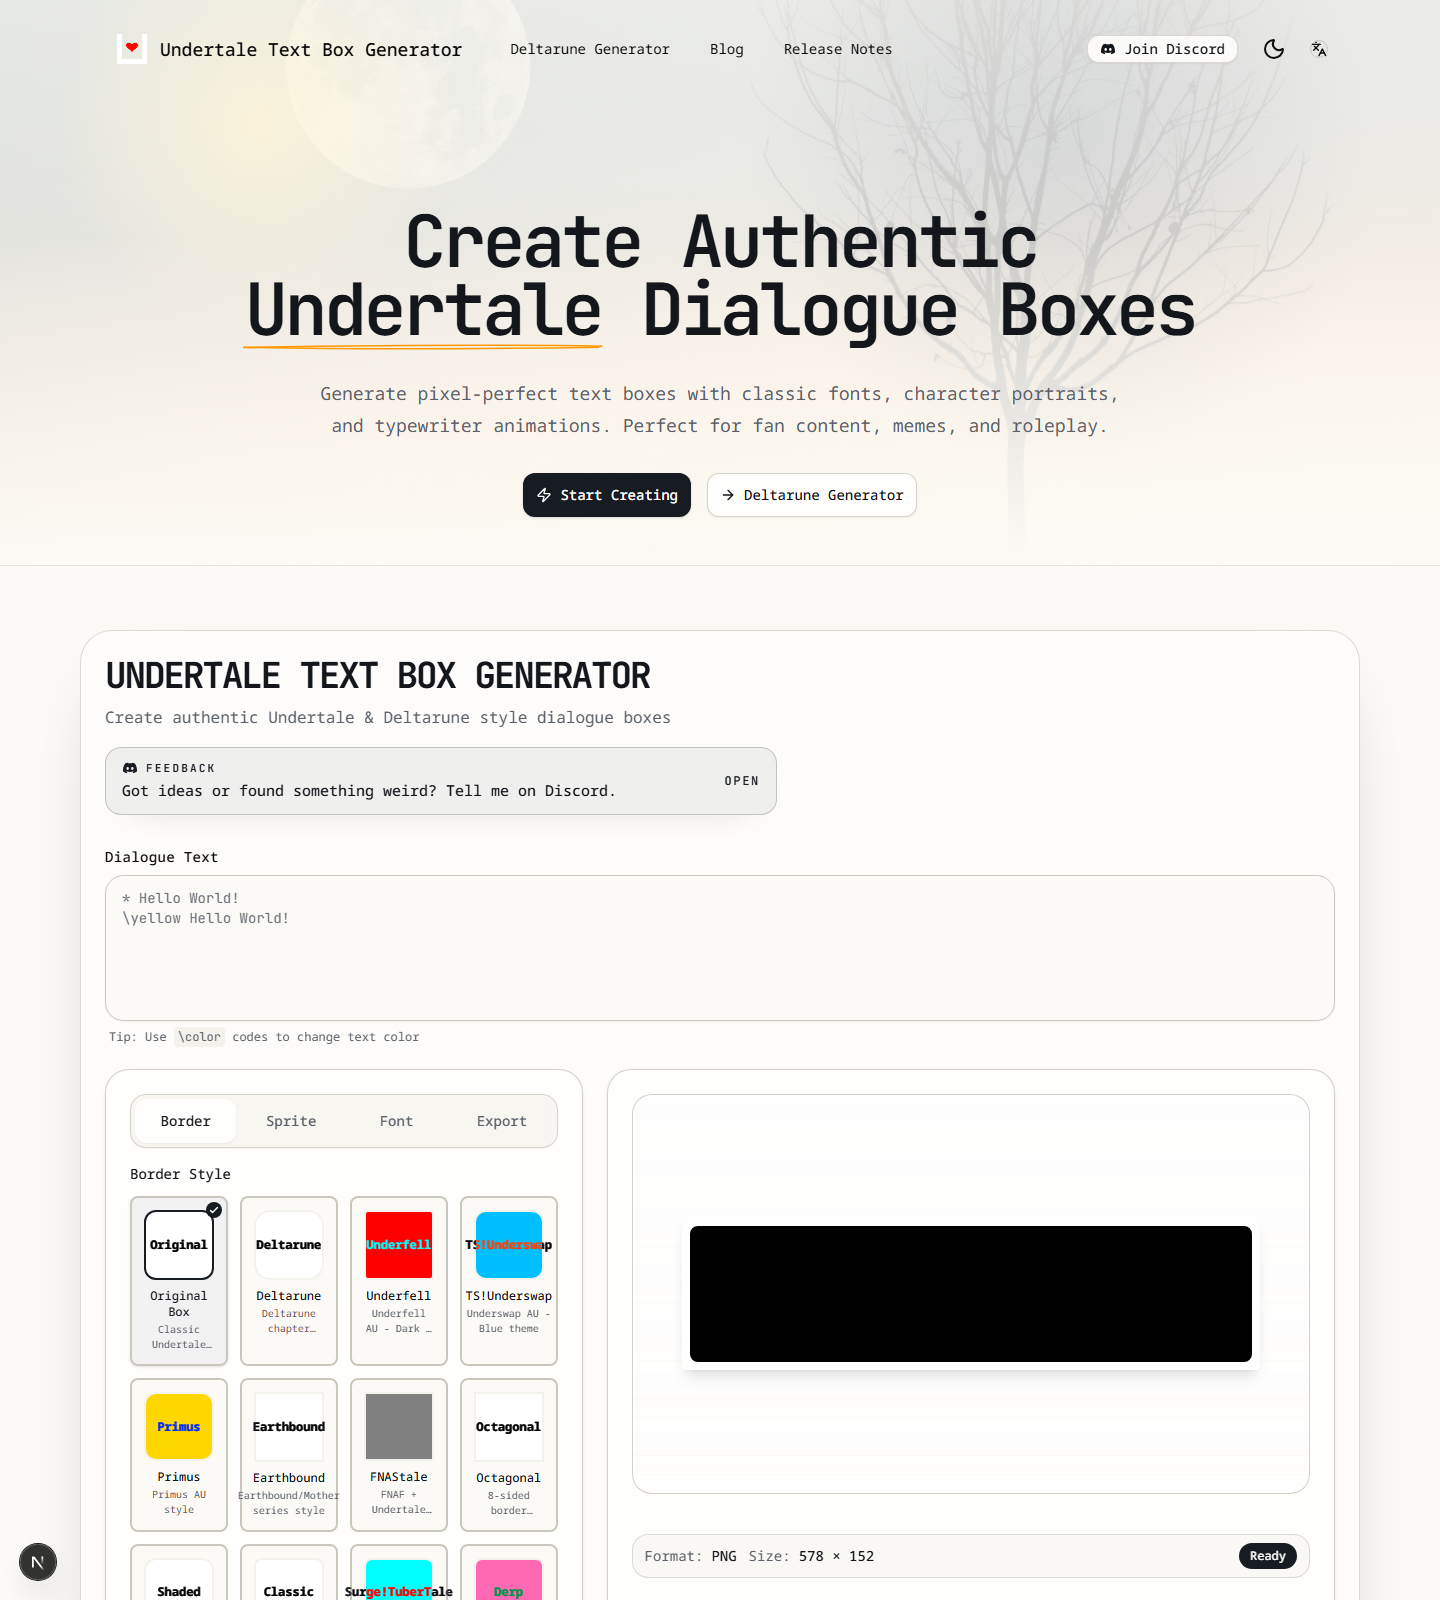
Write your dialogue exactly as you want it to appear. The editor supports line breaks, so you can build a full mini-scene instead of a single sentence.
Example:
* despite everything,
\yellow it's still you.
That gives you a standard Undertale-style first line and a yellow second line.
Step 2: Use Color Codes the Way the Tool Expects
The parser currently recognizes these inline color tags:
\white\yellow\red\cyan\orange\green\blue
Put the code directly before the text you want to recolor.
Example:
* sans is talking normally.
\cyan this part feels colder.
\red this part feels like trouble.
This is one of the fastest ways to make a fake battle line, warning box, or punchline land better.
How to Make a Yellow Undertale Text Box That Still Looks In-Game
People search for an Undertale yellow text box generator because they want emphasis without breaking the illusion.
The practical move is simple: keep most of the line white, then use \yellow only on the word or sentence that needs the hit.
* i found your save file.
\yellow don't pretend you didn't.
If the whole box turns yellow, it usually stops feeling like a real Undertale dialogue box and starts feeling like a warning banner. Small doses work better.
Step 3: Pick a Built-In Portrait or Upload Your Own
Open the Sprite tab next.
For quick portrait swaps, the built-in character library is the fastest route:
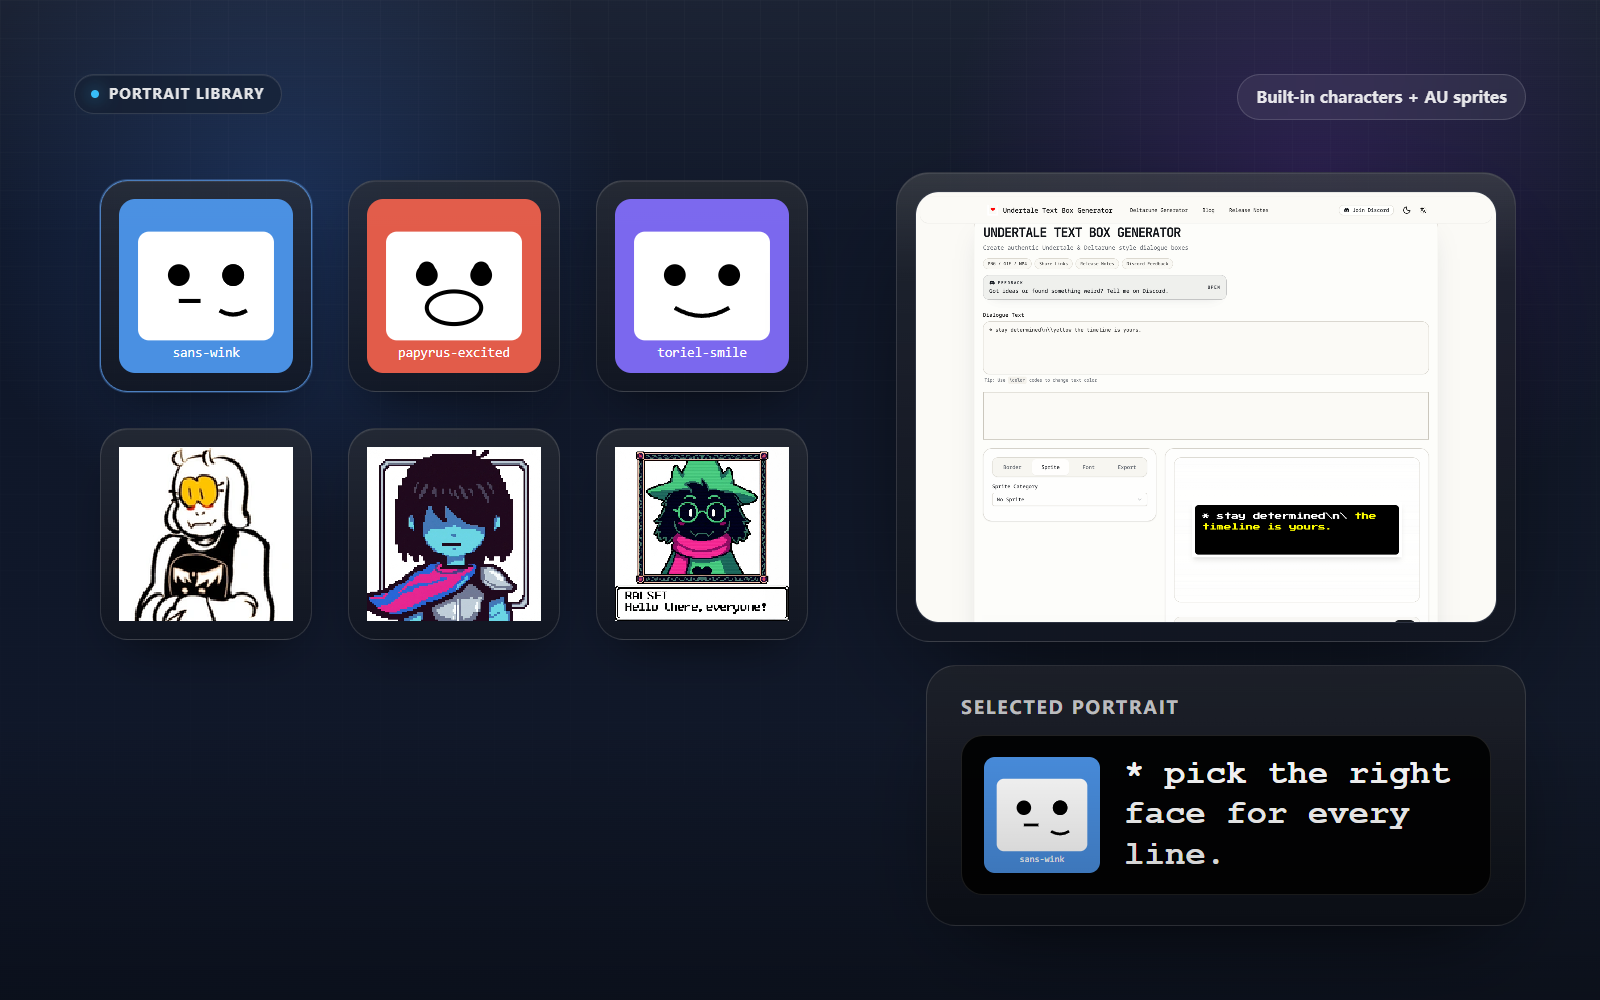
If you want a built-in face, the current editor is strongest with these characters:
- Sans
- Papyrus
- Toriel
- Kris
- Susie
- Ralsei
Undertale portraits have multiple expressions. Deltarune portraits are more basic right now, but the Deltarune preset still gives you a fast starting point.
If you are making a fan scene for a custom character, AU concept, or unreleased idea, switch to the custom sprite option and upload your own image. You can also paste a custom image URL.
After that, use the hue, saturation, and lightness sliders if you need to push the portrait toward a different mood without redrawing the asset.
How to Make a Custom Undertale Text Box with Your Own Sprite
This is the part that makes the tool more than a basic Undertale dialogue box generator.
If you are building an AU joke, an original character bit, or a fake cutscene with art that is not in the preset list, open the custom sprite option and upload the portrait first. Then check three things before you export:
- The face reads clearly at dialogue-box size
- The expression matches the line length and tone
- The border and font still look like the same universe as the sprite
That last part matters. A custom Undertale text box only works when the sprite looks intentional, not pasted in from some other game.
Sans, Papyrus, and Other Fast Character Setups
Some of your easiest wins come from using the built-in portraits instead of rebuilding everything from scratch.
If you want a Sans text box generator workflow, start with a short line, leave more empty space than you think you need, and let the portrait carry the joke.
If you want a Papyrus text box, push the sentence toward something louder or more dramatic. The portrait is already doing half the comedy, so the line does not need extra decoration.
That is also why this works better as a dialogue maker than a generic caption tool. The character face is part of the writing.
Step 4: Tune the Box Style and Font
This is where the result stops looking like a generic meme caption and starts reading like an actual game screenshot.
Font choice changes the feel immediately, even before you touch export settings:
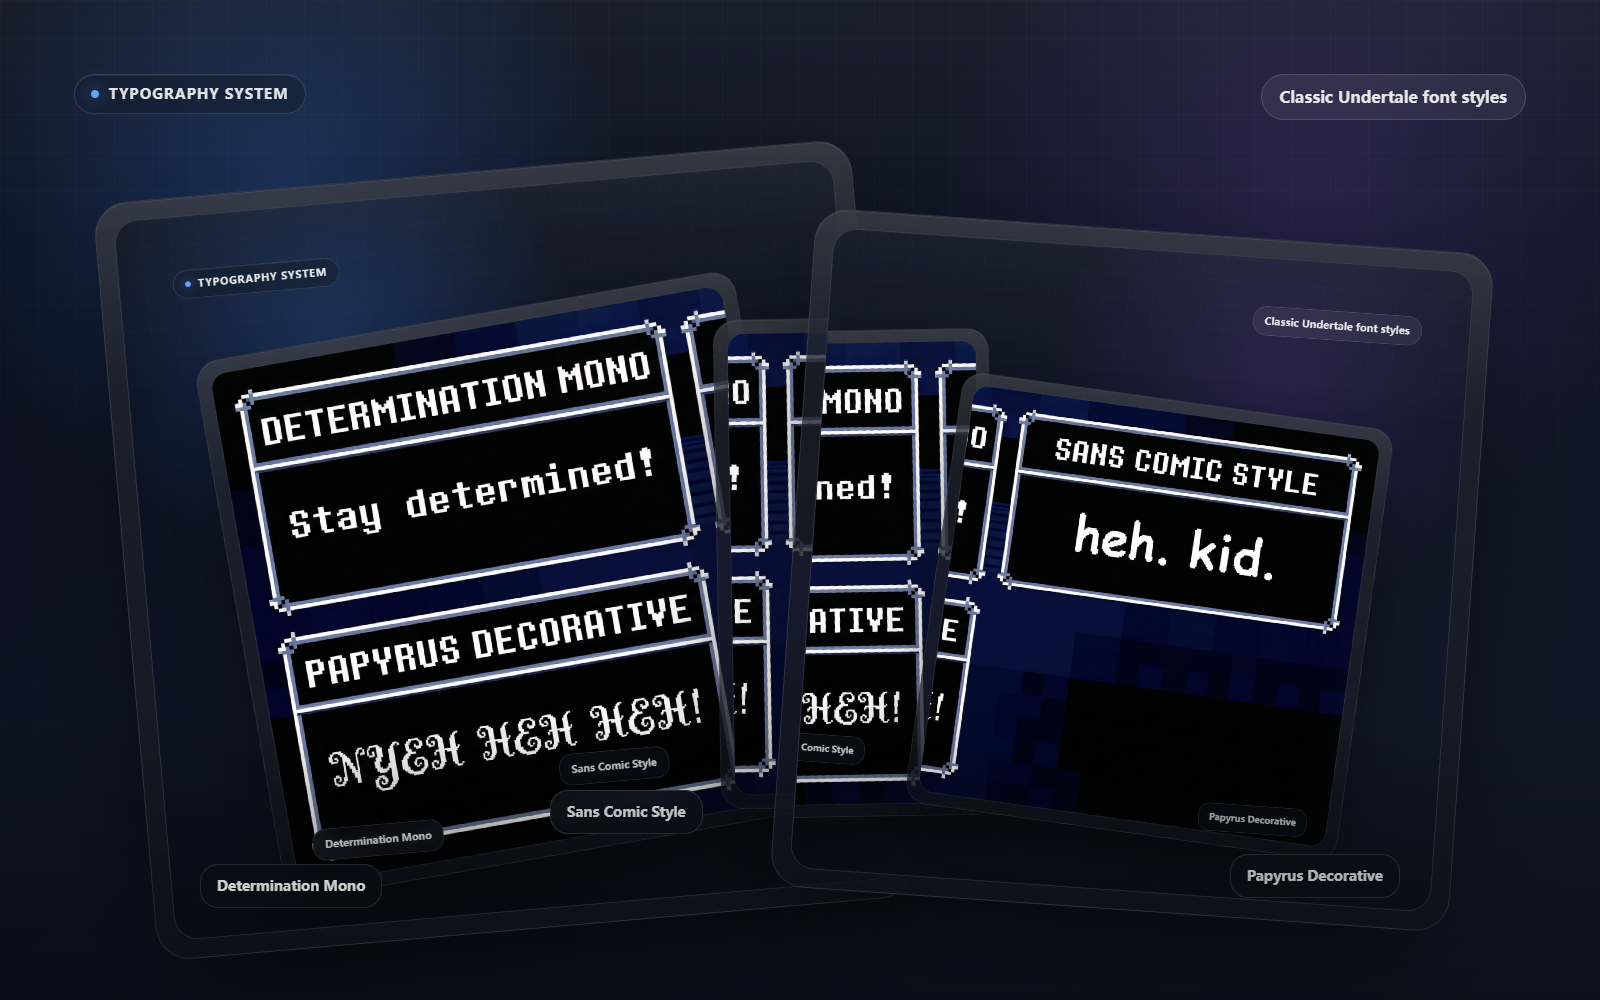
In the Border tab, you can switch between presets such as:
- Original Box
- Deltarune
- Underfell
- TS!Underswap
- Earthbound
- Octagonal
There are also advanced controls for border width, inner border width, corner radius, color, and shadow.
In the Font tab, you can change:
- Font family
- Asterisk behavior
- Text style
- Case transform
- Font size
- Letter spacing
If you want a good default, start with Determination Mono, keep the asterisk on Auto, and only increase letter spacing a little. Heavy spacing breaks the illusion fast.
Step 5: Preview the Typing Effect
Hit Play to preview the typewriter animation.
That preview is where you catch awkward pacing and line breaks before exporting:
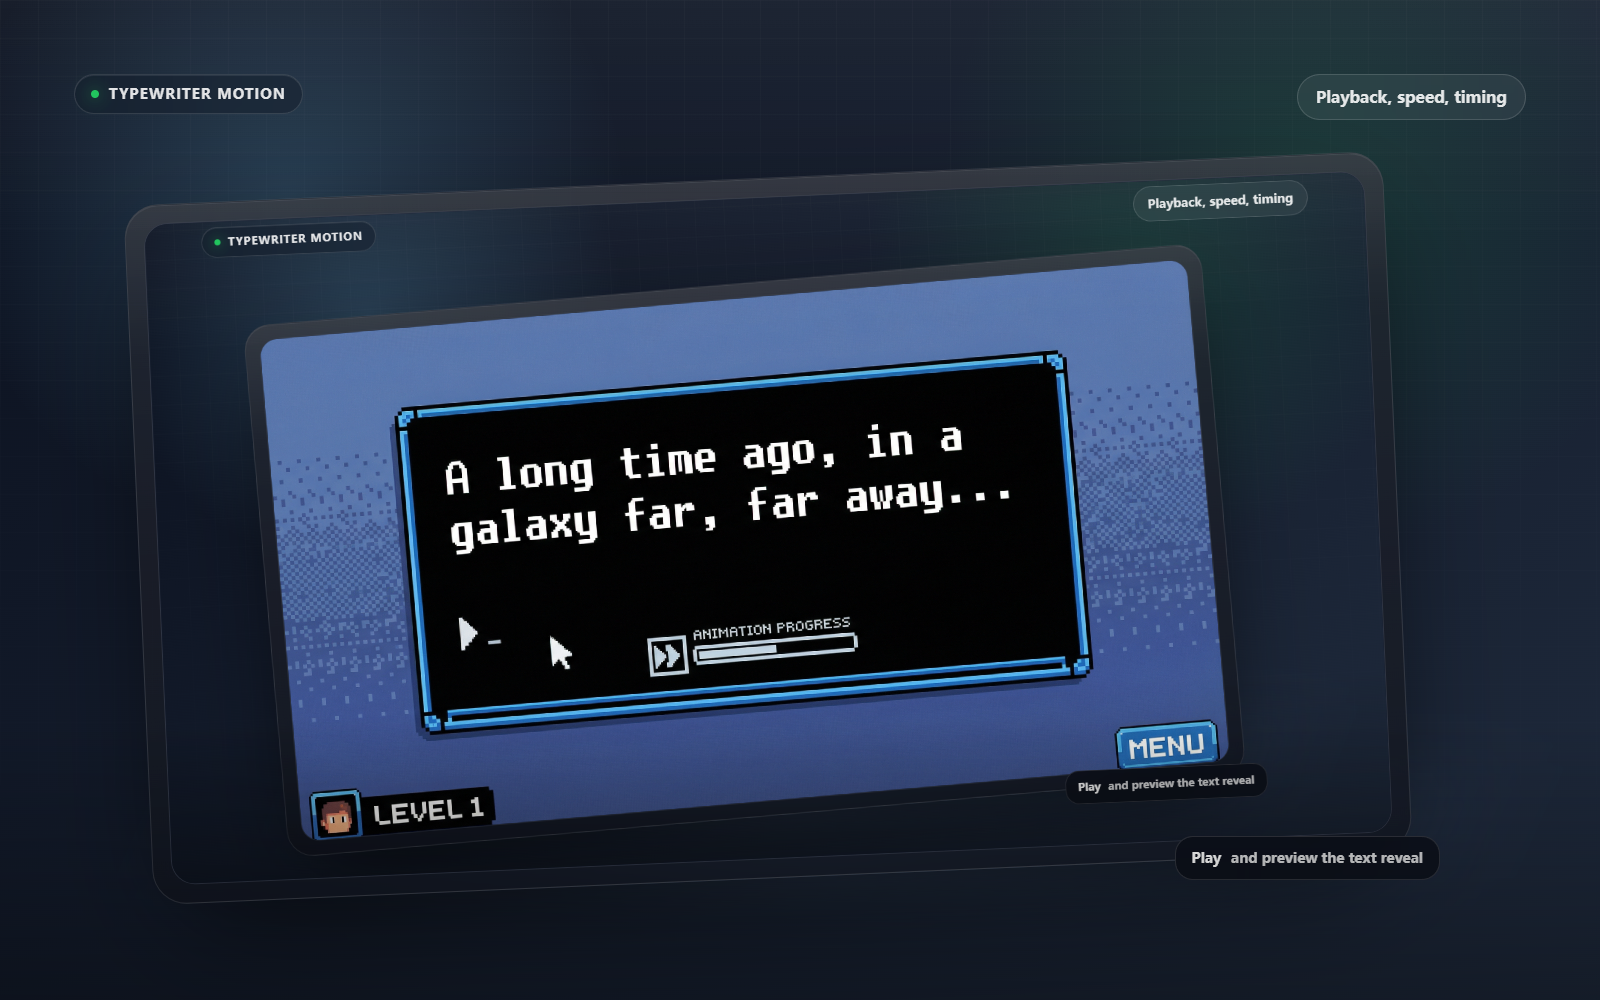
This matters more than people think. A still box is enough for a screenshot, but the typing preview helps you catch awkward line breaks, weird pacing, and sprite choices that feel off once the scene actually plays.
If the line feels cramped, shorten the sentence before you start brute-forcing font size. Most fake Undertale scenes look wrong because the dialogue is too long, not because the border is wrong.
Step 6: Export the Right Format for the Job
The editor supports three practical outputs:
The export flow in the current project is built around those three output types:
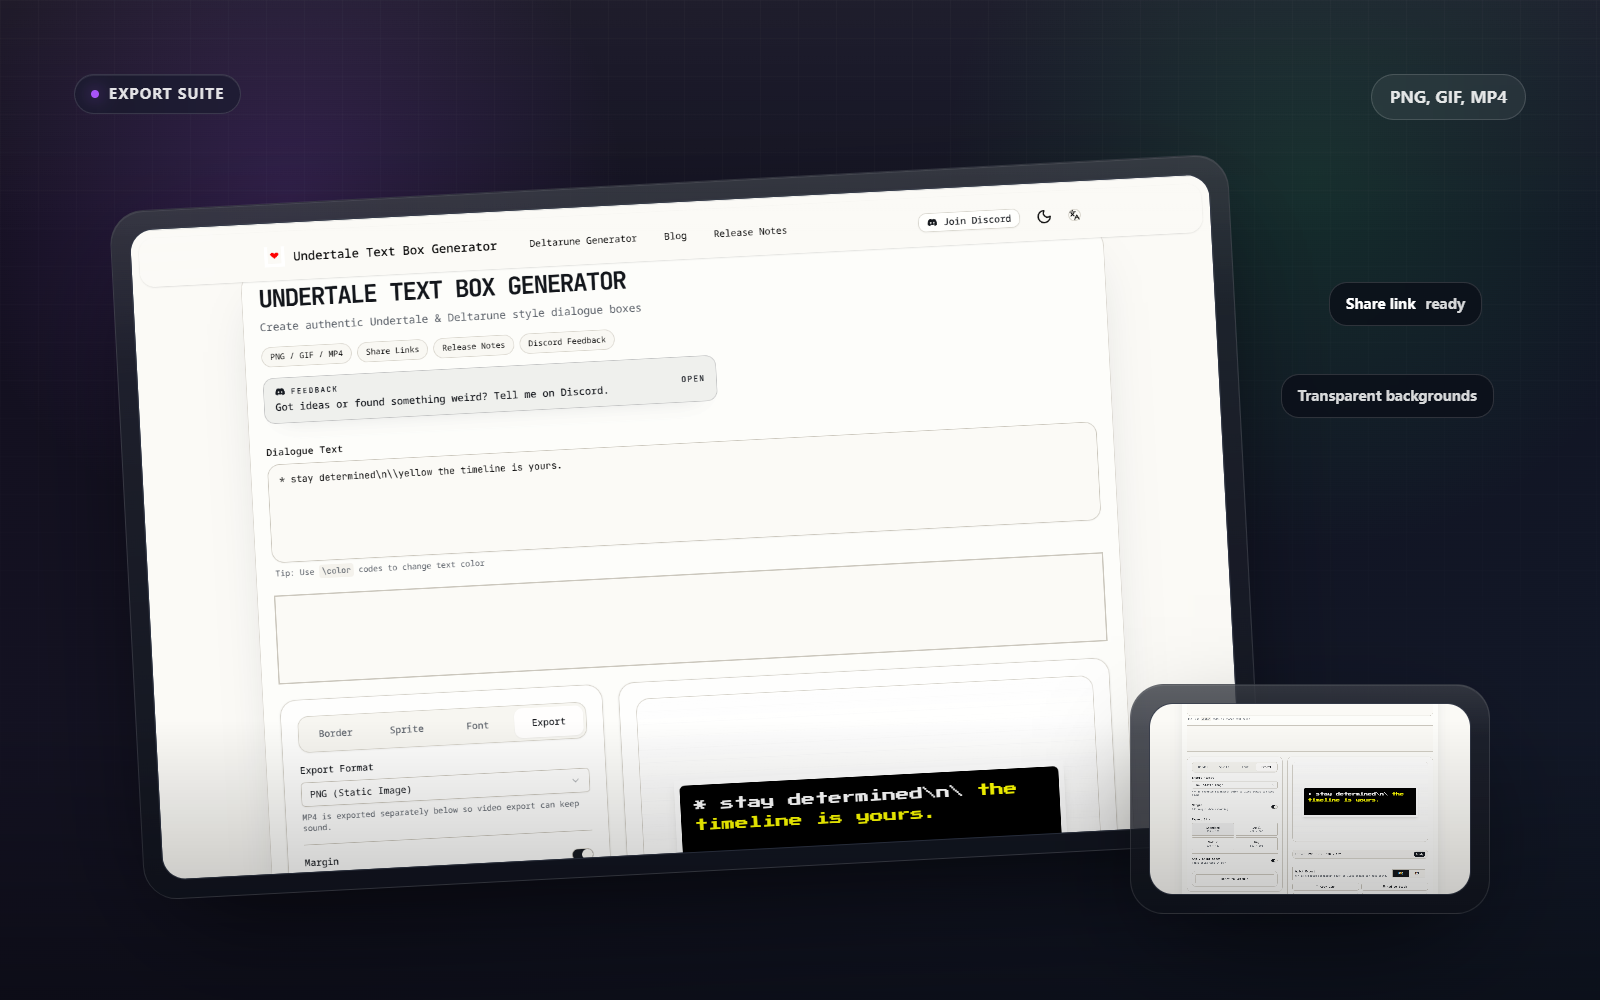
PNGfor a still imageGIFfor looping dialogue animationMP4for a video export with typing audio
Use PNG when you want a fast shareable screenshot.
Use GIF when the typing motion is the joke.
Use MP4 when sound matters, especially for fan edits, meme posts, and short clips you want to drop into another video.
The export panel also lets you switch canvas size. If you are making something for social, test the bigger sizes before exporting. Small text is the fastest way to make a good gag unreadable on mobile.
How to Make an Undertale Text Box GIF or MP4 with Sound
This is one of the clearest long-tail jobs in the product.
If you only need a reaction image, export PNG and move on. If you want the typing motion itself to carry the bit, export GIF. If you want typing audio, export MP4.
The split matters because people often search for an Undertale text box generator with sound when what they actually need is the MP4 path, not the still-image path.
Use this shortcut:
PNGfor static memes and screenshotsGIFfor looping animated dialogueMP4for animated dialogue with sound
That keeps you from forcing one export format to do a different job.
Best Ways to Use It
This tool is strongest for a few very specific jobs:
- Fake Undertale dialogue screenshots
- Battle warning text
- Character reaction memes
- Fan-made cutscene mockups
- Deltarune-style conversation clips
- Custom AU or original character dialogue
If your goal is “make one line fast,” the homepage flow is enough.
If your goal is “make something that feels like a real Deltarune scene,” use the dedicated Deltarune setup instead. Read the Deltarune text box generator guide for that workflow.
Common Mistakes
Writing too much text
Undertale boxes read best when the line is tight. If the sentence needs a paragraph, split it into multiple boxes instead of trying to crush everything into one.
Overdoing font changes
One font switch can create style. Three font switches usually create chaos.
Treating every export the same
PNG, GIF, and MP4 solve different problems. Pick the format after you know where the result is going.
Ignoring the sprite
The portrait does half the storytelling. A flat expression with dramatic text makes the scene feel fake immediately.
Quick Answers People Usually Need
Is this an Undertale text box maker or a dialogue generator?
Both, really. If you only need a still box, it works like a fast Undertale text box maker. If you want animation, portraits, color tags, and export control, it behaves more like an Undertale dialogue generator.
Can I make an animated Undertale text box here?
Yes. Hit Play to preview the typewriter effect, then export a GIF if you want a loop or MP4 if you want the animated text box with sound.
Can I make a custom Undertale text box instead of using Sans or Papyrus?
Yes. Upload your own sprite or paste an image URL, then tune the border, font, and color so the result still feels like it belongs in the same scene.
Final Workflow to Remember
If you forget everything else, remember this:
- Write the line.
- Add the right portrait.
- Fix the border and font.
- Preview the animation.
- Export the format that matches the post.
That is the whole game.